Desenvolvimento - C#
Série VSTS na prática: Criando um Build Type
O primeiro passo para criação de build é justamente criar um tipo de build. O Build Type é o processo que o build deverá executar, para tanto, precisamos pré defini-lo e deixá-lo armazenado para utilizar quando necessário.
por Marcus GarciaO primeiro passo para criação de build é justamente criar um tipo de build. O Build Type é o processo que o build deverá executar, para tanto, precisamos pré defini-lo e deixá-lo armazenado para utilizar quando necessário.
Passo-a-passo
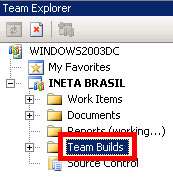
Abra o Team Explorer e escolha um Team Project dê um duplo clique em Team Build.. .
Figura 1
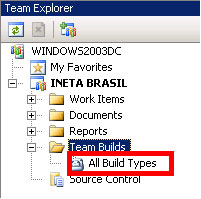
Caso algum Build Type já tenha sido criado serão listados abaixo de All Build Types ... (Figura 2)
Figura 2
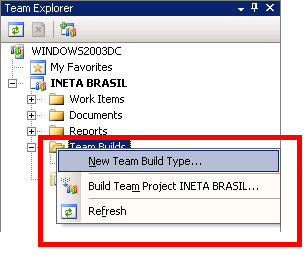
Agora clique com o botão direito do mouse sobre Team Builds e escolha New Team Build type para a criação de um novo processo (Figura 3)...
Figura 3
O Modo Wizard será iniciado, a partir de agora o processo de criação é totalmente guaido (Figura 4)...
Figura 4
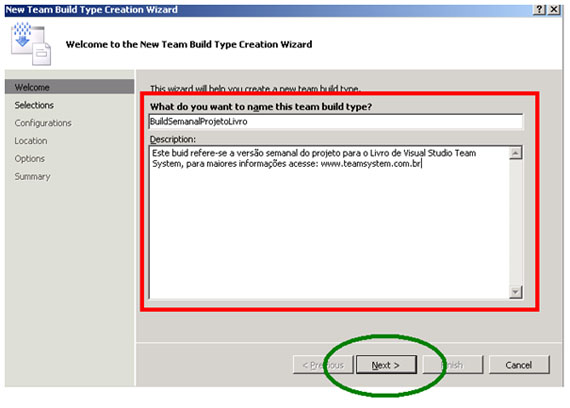
Após definir um nome para o processo e sua descrição, você deve agora definir quais os projetos que farão parte desse build automatizado. (Figura 5)
Figura 5
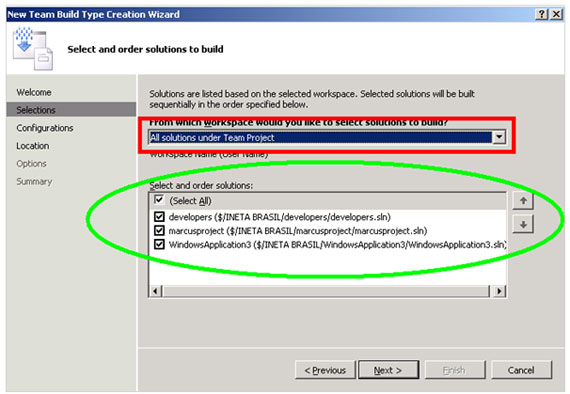
Nessa etapa é importante notar que aparecerão para você somente as soluções que estejam controladas pelo Team Project escolhido (Figura 3) você deve escolher pelo menos uma solução. Caso não apareça nenhuma verifique se o projeto que esta querendo que faça parte já esta sendo controlado pelo Team Project em questão.
Você deve escolher também o tipo de configuração ao qual esse build após estar funcional deva rodar (Release/debug) e em qual plataforma (x86,x64,.NET, etc) Figura 6.
Figura 6 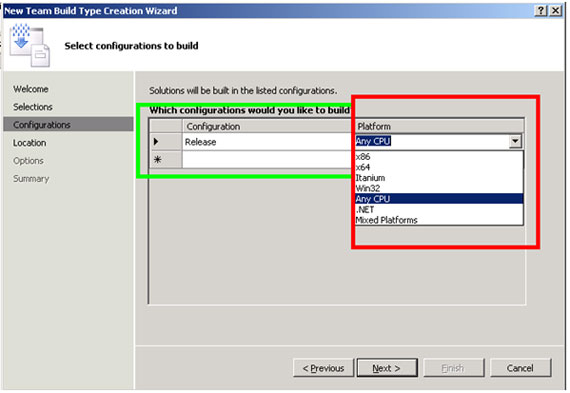
A próxima etapa trata do local onde será criado o build após executado, qual o servidor ou maquina e também o local que receberá os build que ocorreram problemas. (Figura 7)
Figura 7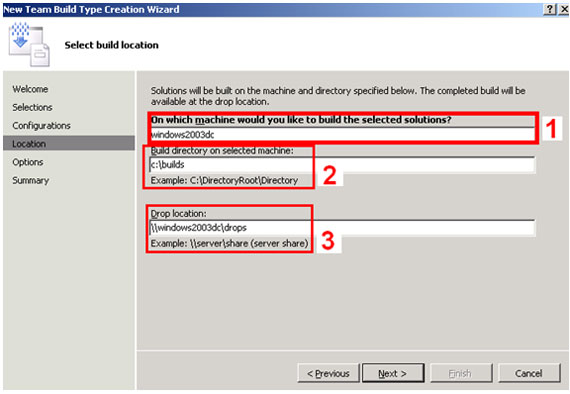
Em opções que é a próxima tela, você pode considerar determinados testes que devem rodar antes de começar a gerar o build. Você pode também forçar ao build considerar regras de análise de código que você definiu anteriormente no Team Project referente. (Figura 8)
Figura 8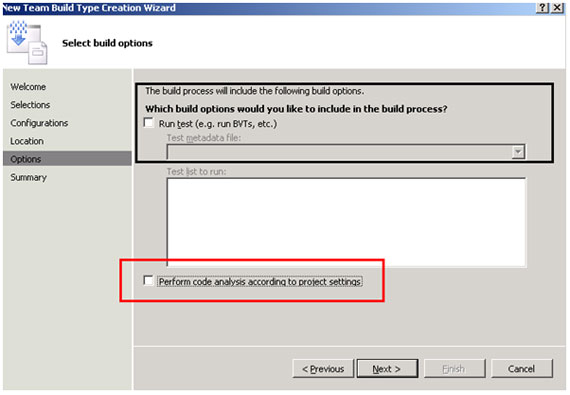
Clique no penúltimo J Next e será remetido ao Summary, que mostra a você todas as definições escolhidas até o momento (Figura 9) inclusive o local onde estará sendo gravado fisicamente o “projeto de build” definido até agora.
Figura 9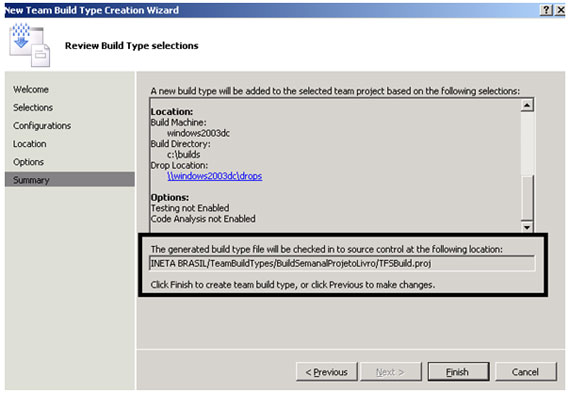
Finalmente temos um Processo de build criado (Figura 10) e a partir desse processo podemos analisar o código que foi criado e que será considerado toda vez que for ativado esse processo.
Figura 10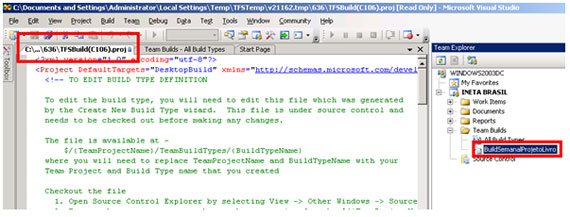
Analisando o código gerado a partir de suas definições de processo
|
<?xml version="1.0" encoding="utf-8"?> <Project DefaultTargets="DesktopBuild" xmlns="http://schemas.microsoft.com/developer/msbuild/2003"> <!-- TO EDIT BUILD TYPE DEFINITION
To edit the build type, you will need to edit this file which was generated by the Create New Build Type wizard. This file is under source control and needs to be checked out before making any changes.
The file is available at - $/{TeamProjectName}/TeamBuildTypes/{BuildTypeName} where you will need to replace TeamProjectName and BuildTypeName with your Team Project and Build Type name that you created
Checkout the file 1. Open Source Control Explorer by selecting View -> Other Windows -> Source Control Explorer 2. Ensure that your current workspace has a mapping for the $/{TeamProjectName}/TeamBuildTypes folder and that you have done a "Get Latest Version" on that folder 3. Browse through the folders to {TeamProjectName}->TeamBuildTypes->{BuildTypeName} folder 4. From the list of files available in this folder, right click on TfsBuild.Proj. Select "Check Out For Edit..."
Make the required changes to the file and save
Checkin the file 1. Right click on the TfsBuild.Proj file selected in Step 3 above and select "Checkin Pending Changes" 2. Use the pending checkin dialog to save your changes to the source control
Once the file is checked in with the modifications, all future builds using this build type will use the modified settings --> <!-- Do not edit this --> <Import Project="$(MSBuildExtensionsPath)\Microsoft\VisualStudio\v8.0\TeamBuild\Microsoft.TeamFoundation.Build.targets" /> <ProjectExtensions> <!-- DESCRIPTION The description is associated with a build type. Edit the value for making changes. --> <Description>Este buid refere-se a versão semanal do projeto para o Livro de Visual Studio Team System, para maiores informações acesse: www.teamsystem.com.br</Description> <!-- BUILD MACHINE Name of the machine which will be used to build the solutions selected. --> <BuildMachine>windows2003dc</BuildMachine> </ProjectExtensions> <PropertyGroup> <!-- TEAM PROJECT The team project which will be built using this build type. --> <TeamProject>INETA BRASIL</TeamProject> <!-- BUILD DIRECTORY The directory on the build machine that will be used to build the selected solutions. The directory must be a local path on the build machine (e.g. c:\build). --> <BuildDirectoryPath>c:\builds</BuildDirectoryPath> <!-- DROP LOCATION The location to drop (copy) the built binaries and the log files after the build is complete. This location has to be a valid UNC path of the form \\Server\Share. The build machine service account and application tier account need to have read write permission on this share. --> <DropLocation>\\windows2003dc\drops</DropLocation> <!-- TESTING Set this flag to enable/disable running tests as a post build step. --> <RunTest>false</RunTest> <!-- WorkItemFieldValues Add/edit key value pairs to set values for fields in the work item created during the build process. Please make sure the field names are valid for the work item type being used. --> <WorkItemFieldValues>Symptom=build break;Steps To Reproduce=Start the build using Team Build</WorkItemFieldValues> <!-- CODE ANALYSIS To change CodeAnalysis behavior edit this value. Valid values for this can be Default,Always or Never.
Default - To perform code analysis as per the individual project settings Always - To always perform code analysis irrespective of project settings Never - To never perform code analysis irrespective of project settings --> <RunCodeAnalysis>Never</RunCodeAnalysis> <!-- UPDATE ASSOCIATED WORK ITEMS Set this flag to enable/disable updating associated workitems on a successful build --> <UpdateAssociatedWorkItems>true</UpdateAssociatedWorkItems> <!-- Title for the work item created on build failure --> <WorkItemTitle>Build failure in build:</WorkItemTitle> <!-- Description for the work item created on build failure --> <DescriptionText>This work item was created by Team Build on a build failure.</DescriptionText> <!-- Text pointing to log file location on build failure --> <BuildlogText>The build log file is at:</BuildlogText> <!-- Text pointing to error/warnings file location on build failure --> <ErrorWarningLogText>The errors/warnings log file is at:</ErrorWarningLogText> </PropertyGroup> <ItemGroup> <!-- SOLUTIONS The path of the solutions to build. To add/delete solutions, edit this value. For example, to add a solution MySolution.sln, add following line - <SolutionToBuild Include="$(SolutionRoot)\path\MySolution.sln" />
To change the order in which the solutions are build, modify the order in which the solutions appear below. --> <SolutionToBuild Include="$(SolutionRoot)\developers\developers.sln" /> <SolutionToBuild Include="$(SolutionRoot)\marcusproject\marcusproject.sln" /> <SolutionToBuild Include="$(SolutionRoot)\WindowsApplication3\WindowsApplication3.sln" /> </ItemGroup> <ItemGroup> <!-- CONFIGURATIONS The list of configurations to build. To add/delete configurations, edit this value. For example, to add a new configuration, add following lines - <ConfigurationToBuild Include="Debug|x86"> <FlavorToBuild>Debug</FlavorToBuild> <PlatformToBuild>x86</PlatformToBuild> </ConfigurationToBuild>
The Include attribute value should be unique for each ConfigurationToBuild node. --> <ConfigurationToBuild Include="Release|Any CPU"> <FlavorToBuild>Release</FlavorToBuild> <PlatformToBuild>Any CPU</PlatformToBuild> </ConfigurationToBuild> </ItemGroup> <ItemGroup> <!-- TEST ARGUMENTS If the RunTest is set to true then the following test arguments will be used to run tests.
To add/delete new testlist or to choose a metadata file (.vsmdi) file, edit this value. For e.g. to run BVT1 and BVT2 type tests mentioned in the Helloworld.vsmdi file, add the following -
<MetaDataFile Include="$(SolutionRoot)\HelloWorld\HelloWorld.vsmdi"> <TestList>BVT1;BVT2</TestList> </MetaDataFile>
Where BVT1 and BVT2 are valid test types defined in the HelloWorld.vsmdi file. MetaDataFile - Full path to test metadata file. TestList - The test list in the selected metadata file to run.
Please note that you need to specify the vsmdi file relative to $(SolutionRoot) --> <MetaDataFile Include=" "> <TestList> </TestList> </MetaDataFile> </ItemGroup> <ItemGroup> <!-- ADDITIONAL REFERENCE PATH The list of additional reference paths to use while resolving references. For example, <AdditionalReferencePath Include="C:\MyFolder\" /> <AdditionalReferencePath Include="C:\MyFolder2\" /> --> </ItemGroup> </Project>
|
Conclusão
Como o Ajudante de criação de processos até o momento da publicação deste artigo não permite edição direta na ferramenta, sempre que necessário mudar um processo de build é prudente fazer a alteração direto no código listado anteriormente ou simplesmente começar um novo processo. Criar um tipo de build é o primeiro passo para executar builds automáticos.